Edit and create dbt models beta
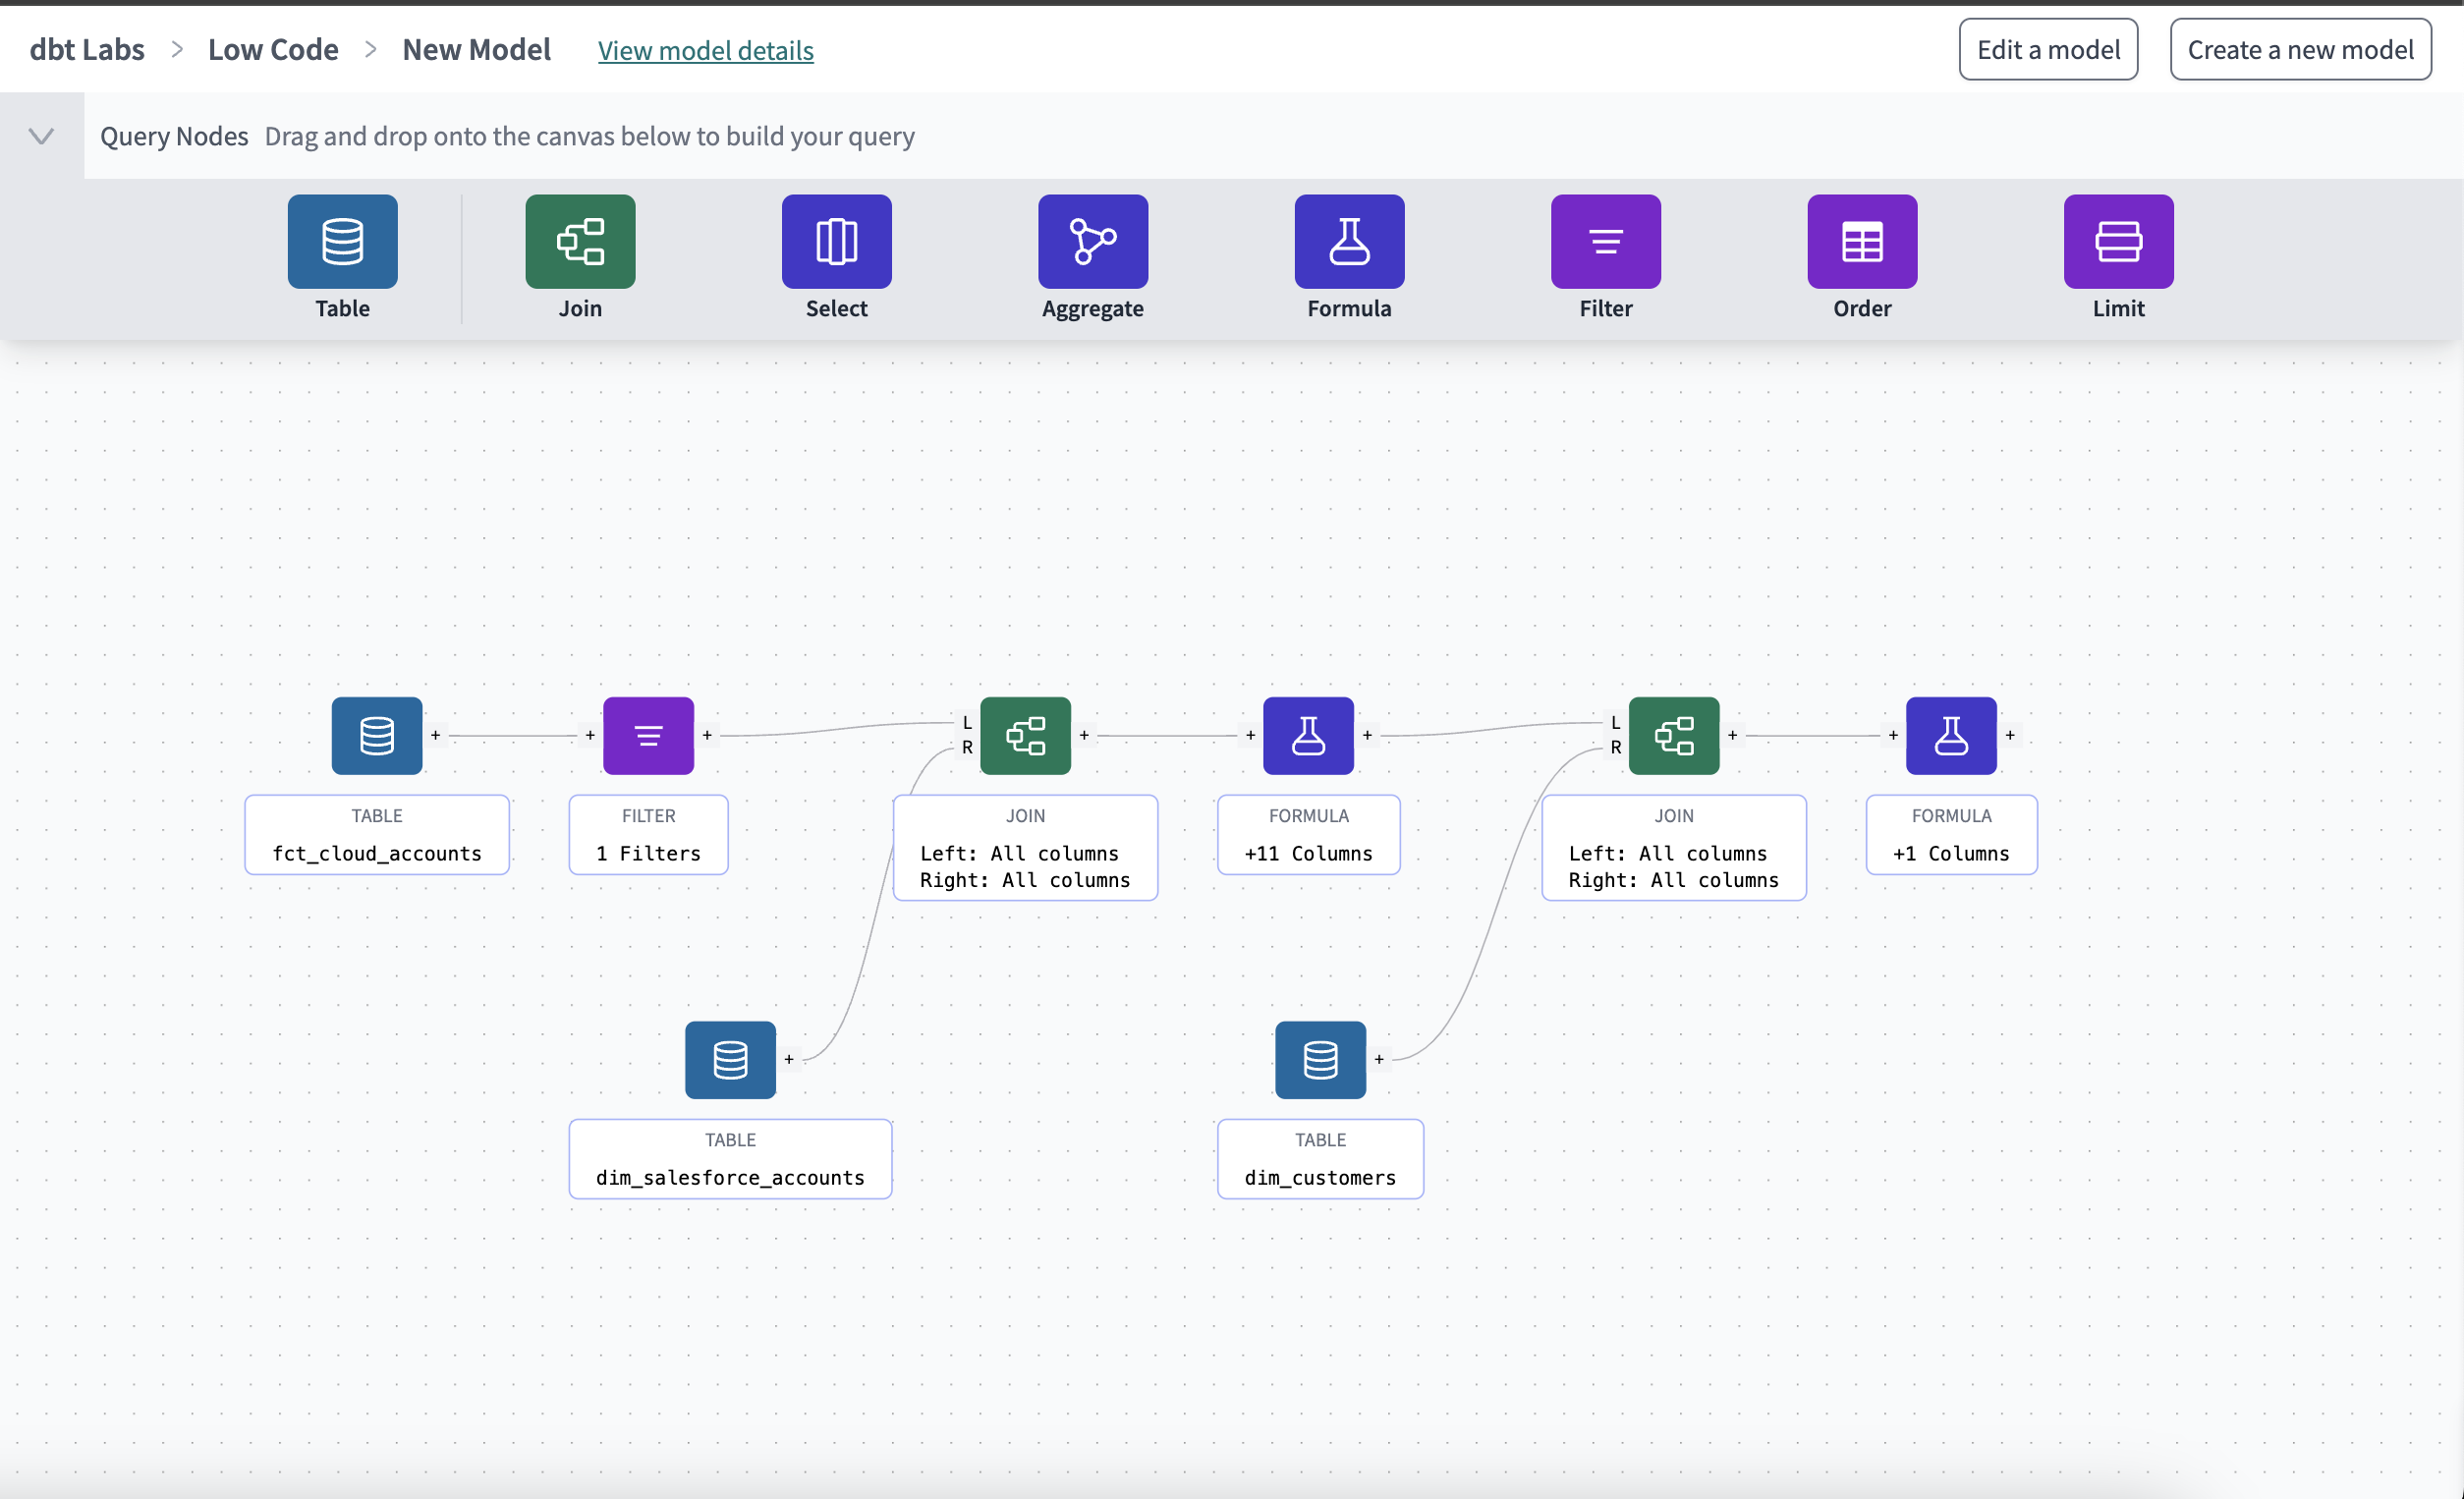
Access and use the dbt Cloud visual editor to create or edit dbt models through a visual, drag-and-drop experience. Use the built-in AI for custom code generation in your development experience.
The visual editor provides users with a seamless and drag-and-drop experience inside of dbt Cloud. It's available in private beta for dbt Cloud Enterprise accounts.
To join the private beta, register your interest or reach out to your account team to begin this process.
Prerequisites
- You have a dbt Cloud Enterprise account
- You have a developer license with developer credentials set up
- You have an existing dbt Cloud project already created
- You are Keep on latest for a versionless experience
- Successful job run on Production or Staging environment
- Have AI-powered features toggle enabled
Access visual editor
Before accessing the editor, you should have a dbt Cloud project already set up. This includes a Git repository, data platform connection, environments, and developer credentials. If you don't have this set up, please contact your dbt Cloud Admin.
To access the visual editor:
-
Type in the following URL, replacing the ACCOUNT_ID and ENVIRONMENT_ID with your own account and environment ID:
https://ACCESS_URL/visual-editor/ACCOUNT_ID/env/ENVIRONMENT_ID/- The environment ID must have had runs that generated catalogs in it.
-
For example, if my region is North America multi-tenant, account ID is 10, environment ID with a generated catalog run is 100, my URL should be:
https://cloud.getdbt.com/visual-editor/10/env/100/
Create a model
To create a dbt SQL model, click on Create a new model and perform the following steps. Note that you can't create source models in the visual editor. This is because you need to have production run with sources already created.
- Drag an operator from the operator toolbar and drop it onto the canvas.
- Click on the operator to open its configuration panel:
- Table: Select the table and columns you want to use.
- Join: Define the join conditions and choose columns from both tables.
- Select: Pick the columns you need from the table.
- Aggregate: Specify the aggregation functions and the columns they apply to.
- Formula: Add the formula to create a new column. Use the built-AI code generator to help generate SQL code by clicking on the question mark (?) icon. Enter your prompt and wait to see the results.
- Filter: Set the conditions to filter data.
- Order: Select the columns to sort by and the sort order.
- Limit: Set the maximum number of rows you want to return.
- View the Output and SQL Code tabs.
- Each operator has an Output tab that allows you to preview the data from that configured node.
- The Code tab displays the SQL code generated by the node's configuration. Use this to see the SQL for your visual model config.
- Connect the operators by using the connector by dragging your cursor between the operator's "+" start point and linking it to the other operators you want to connect to. This should create a connector line.
- Doing this allows the data to flow from the source table through various transformations you configured, to the final output.
- Keep building your dbt model and ensure you confirm the out through the Output tab.
Edit an existing model
To edit an existing model, navigate to the visual editor and click on the Edit a model button on the upper right. This will allow you to select the model you'd like to edit.
Version control
Testing and documenting your models is an important part of the development process.
Stay tuned! Coming very soon, you'll be able to version control your dbt modes in the visual editor. This ensures you can track changes and revert to previous versions if needed.

